Installing Stone Veneer Over Brick? Use These 5 Expert Tips
October 5, 2021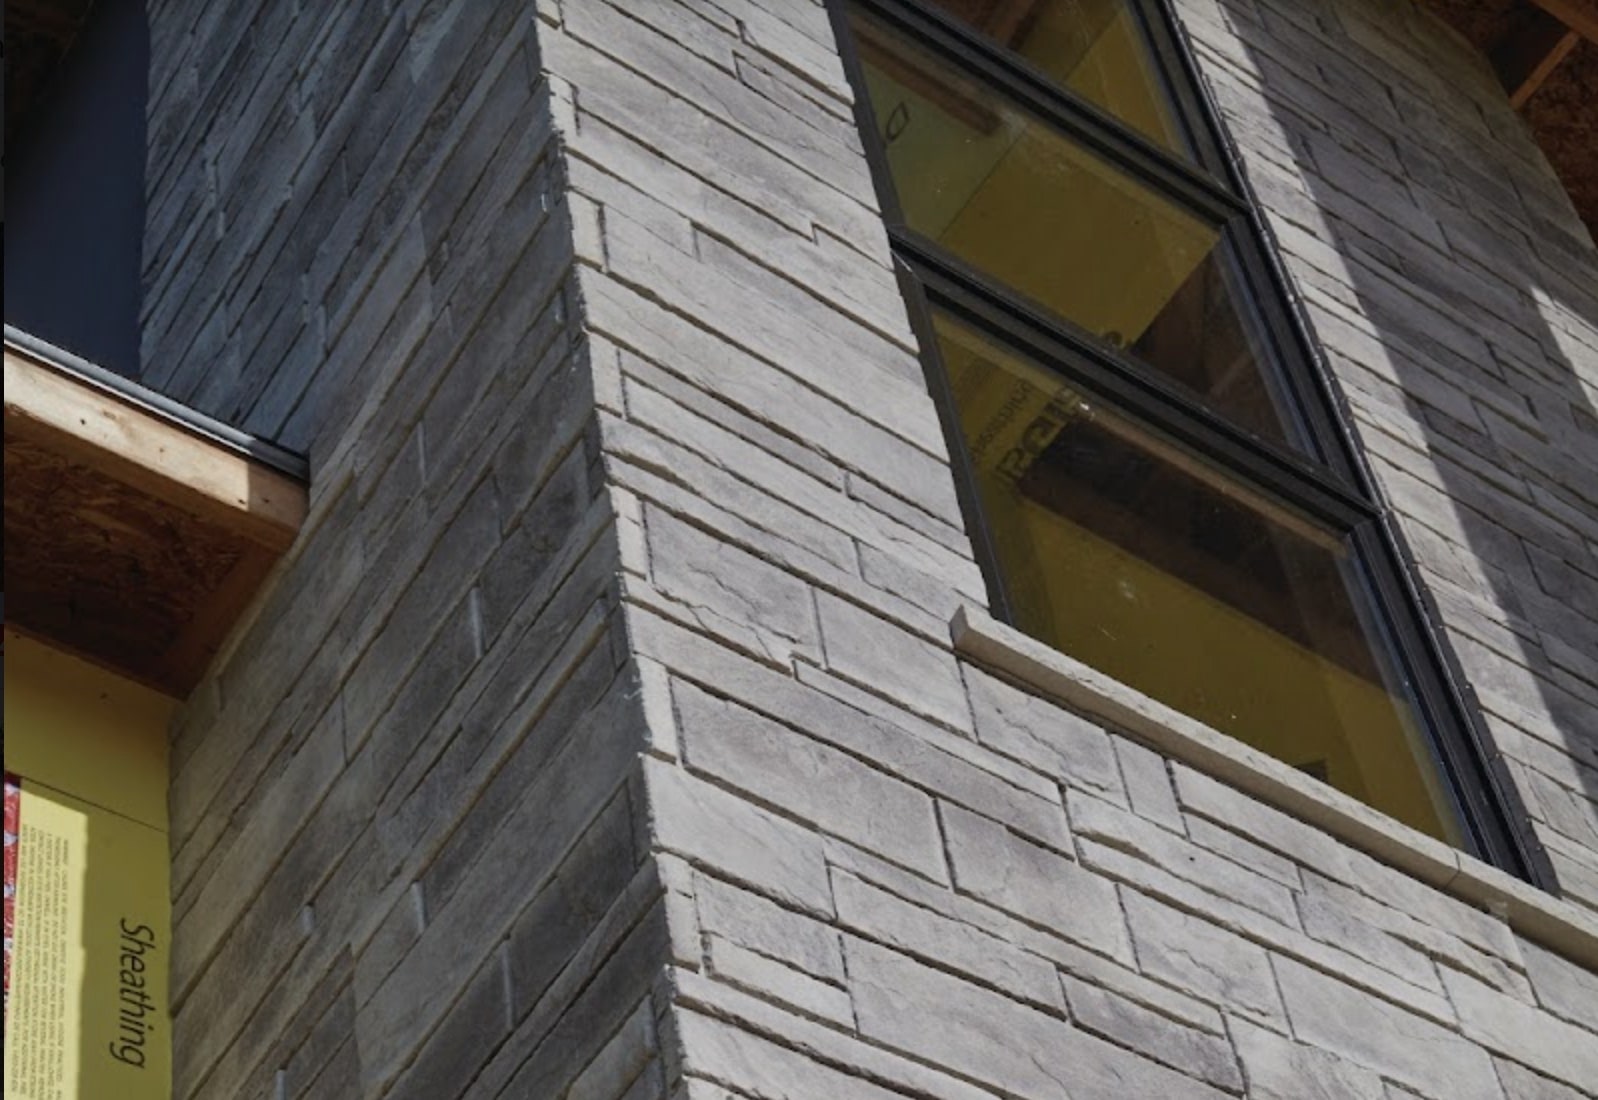
Installing Stone Veneer Over Plywood? Use These Expert Tips
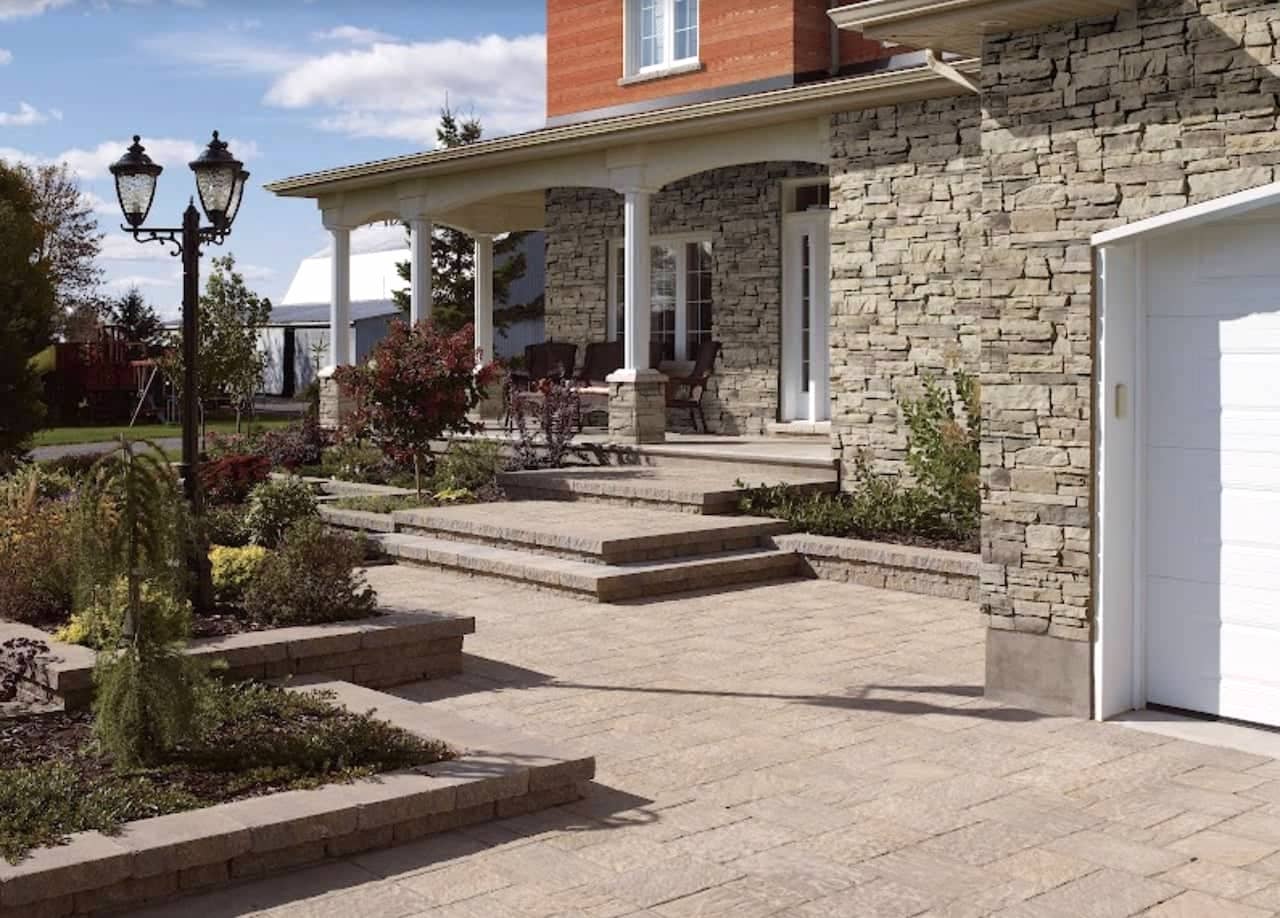
November 10, 2021Stone veneer is an excellent choice for homeowners wanting to elevate their curb appeal and update their homes. Faux stone veneer is much less expensive than natural stone but still gives a luxurious look.
We are going to give you an overview of how to install stone veneer panels over a concrete block. We will include the steps to take from preparation to installation and give a few helpful installation tips. Read on to learn more about how to install stone veneer over concrete.
Can You Cover a Concrete Wall With Stone Veneer?
Many people wonder if you can cover a concrete block or wall with stone veneer. The answer is yes. You can, in fact, install stone veneer over concrete. With Be.On Stone’s mortarless installation system, it’s easy to complete this home project.
Installing Stone Veneer Over a Concrete Block or Wall
Next, we will take a closer look at the steps to take when installing stone veneer. The process is a smooth one as long as you are prepared.
Calculate the Material Needed
The first thing you will want to do is measure the surface area of the concrete wall(s) you are covering. You need to calculate the surface area to determine the number of stone veneer panels you will need.
To measure the surface area, use this formula:
Length (ft) x Height (ft) = Area (sq. ft)
Then you will take the surface area and divide it by two to get the number of panels needed to cover the wall(s). Here is a sample calculation:
Length (16 ft) x Height (8 ft) = 128 sq. ft ÷ 2 = 64 panels
This formula will give you the number of panels you will need to purchase.
Purchase the Stone Veneer
Once you are ready to purchase the stone veneer, you can use this store locator for Be.On Stone’s products. Be.On Stone panels can be found in retailers across the U.S. and Canada.
We recommend that you buy extra panels just in case you need them to complete your exterior siding project.
Contact Your Neighbors and HOA
Before beginning your project, it is a good idea to contact your neighbors and Homeowners Association to alert them of the project. Some homeowner’s associations have regulations and may require approval to change the exterior of your home. Don’t skip this step because your neighborhood or city may require a permit.
Gather the Necessary Tools
Next, you should gather up the tools you will need to install stone veneer over a concrete block wall. Luckily, the tools are pretty basic and you probably already have most of them at the ready.
These tools include:
- Drill
- Screwdriver
- Table Saw
- Concrete Hand Grinder
- Level
- Measuring Tape
- Sheet Metal Cutter
Ensure you have the necessary tools prior to starting the installation to save time.
Install the Starter Strip
It’s time to install the stone veneer! First, you will need to install the Be.On Stone starter strip to the bottom of the area you will cover. Mark a horizontal line 64 mm above the planned base of the stone wall.
Place the top of the starter strip along the line you drew and screw it in every 12 inches along the full length of the wall. Then apply a building cladding tape to the upper part of the starter strip.
Install the Stone Veneer Panels
You will now begin to install the panels along the starter strip. You can cut your panels to the desired size then place them on the concrete wall. Screw the panels to the wall until they are secure. Complete the first row.
Offset the second row of panels and continue until you reach the final row.
The Final Row
For the final row, you may need to cut the panel lengthwise to ensure a perfect fit. Then install the final row of panels leaving 6 mm between the panel and the ceiling or finished surface. We recommend that you install the last two rows simultaneously to make the process seamless. This allows you ample space to slide the final panel into place without any toil.
This was the guide for how to apply stone veneer over a concrete block wall. Hopefully, this has given you a clearer understanding of the installation process and techniques for stone veneer panels.
Continue reading for a few helpful installation tips!

Tips for Applying Stone Veneer Over a Concrete Block
The process is pretty simple once you get the hang of it. Here are some tips to make the installation process smooth and simple for a polished result.
Stagger the panels
Remember to stagger the panels when starting each new row. This will provide a more natural stone look because the stone formation isn’t uniform. To do this, you will need to stagger the placement of the joints. This way, the stone veneer wall(s) won’t look artificial.
Use a water weather-resistant barrier
To ensure the integrity of the concrete surface, we recommend that you install a weather-resistant barrier of some sort. This will protect against water infiltration damage. Be.On Stone panels also have a built-in D.RAIN system that ensures proper drainage in the case of water infiltration.
Watch video tutorials
If you want to see the process in action, check out the Be.On Stone YouTube channel. We have videos on the entire process of installing stone veneer to exterior walls. You can see the visual process to help you prepare for your own project.
We also have a downloadable installation guide PDF.
Be.On Stone Panels Are Easy To Install
If you want to install stone veneer over a concrete block or wall, use Be.On Stone. Our stone veneer panels don’t require any mortar or grout and can be installed at home without a contractor. You can even see your vision using the Be.On Stone visualizer tool!
Our wide selection of products come with a 50-year transferable warranty so you can rest assured your investment is protected in the long term. Get inspiration for your project on our website and contact us today for more information.